Create Your Own SVG Templates
The SVG Overlay filter in ad-pixflow is a powerful feature that lets you place logos and artwork on top of your images, enabling a wide range of creative expressions. Furthermore, you can dynamically replace text within the SVG during image processing. This is perfect for various applications that require text insertion, such as creating name tags.
This guide explains how to create SVG templates for use in ad-pixflow. We've prepared a sample workflow to get you started. Please download and import it first.
You can import the downloaded file from the hamburger menu in the top-left corner of the ad-pixflow screen.
Creating SVGs with AI
For simple SVGs, you can easily create them using an AI chat service. This section will guide you through creating an SVG template with AI.
The "photo-frame" sample workflow generates an image like the one below from an input image.

Click to view gallery
This workflow crops the image to 400x300 pixels and then adds a frame and a message using an SVG overlay. Let's try creating the SVG for this process with AI.
Recommended Prompt
A prompt like the following is effective.
I will be overlaying an SVG on a bitmap image on a webpage. I need a template SVG that contains placeholder text like '%%TEXT%%', which will be replaced at runtime. Please follow the instructions below and provide only the SVG code. No explanation of how to embed it in a webpage is necessary.

I need a photo frame to decorate a bitmap image.
- The size should be 400 x 300 pixels.
- The inside of the frame must be transparent so the underlying bitmap image is visible.
- The frame should have a gorgeous, museum-quality design.
- To add a description for the image, please place the text "%%MESSAGE%%" centered inside the bottom part of the frame.
The first paragraph explains the purpose of the SVG, and the second paragraph details the specific requirements. If you want to create a different SVG, you can reuse the first paragraph and rewrite the second one to match your objective.
We used ChatGpt to execute this prompt. If successful, it should output SVG code like this:
<svg width="400" height="300" viewBox="0 0 400 300" xmlns="http://www.w3.org/2000/svg">
...
</svg>
Since ChatGPT often previews the SVG as an image, simply click "Copy code" (top-right of the block) to get the raw SVG data.
If the chat does not show a preview, paste the output code into a text editor and save it with a name like "frame.svg". You can open this file in a web browser to see the generated SVG image.
If you're not satisfied with the design, you can request changes by giving the AI additional prompts. Crafting good prompts can be tricky, but it's a great opportunity to hone your skills.
Integrating with ad-pixflow
Let's integrate the completed SVG template into a workflow. Copy the "photo-frame" sample workflow and apply the SVG you just created.
- Click the pencil icon on the copied workflow to open the edit screen.
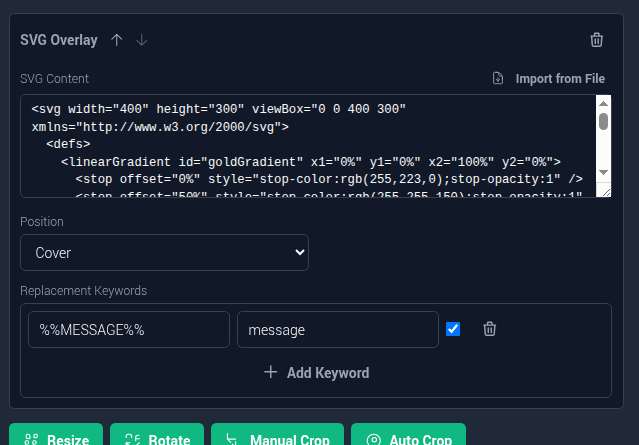
- Modify the SVG Overlay filter settings, which is located near the end of the workflow. Paste your SVG code into the "SVG" form or load it from the file.
- For "Position," select "Cover" to make the overlay span the entire image.
- Check the "Replacement Keywords." Here, the default
messageis set to replace the%%MESSAGE%%placeholder in the SVG at runtime. - Once you're done editing, save the workflow by clicking "Save Workflow."
Your new workflow is now complete. Run it to check the result of your new SVG design.
Using an SVG Editor
While AI is convenient for creating simple SVGs, using a dedicated SVG editor is better for complex graphics or when you need precise text placement. A hybrid approach—generating a base with AI and then making manual adjustments—can also be very efficient.
This section explains how to edit SVGs directly using Inkscape, an open-source editor available for many platforms.
Many vector graphics editors support SVG output, and you can use SVGs created with them. However, be aware that ad-pixflow's text replacement feature might not work correctly with text that has complex styling.
Installing Inkscape
You can download Inkscape from its official website.
As Inkscape is a very popular application, you might be able to install it from the app store on Windows and macOS, or via a package manager like apt on Linux.
Placing Text
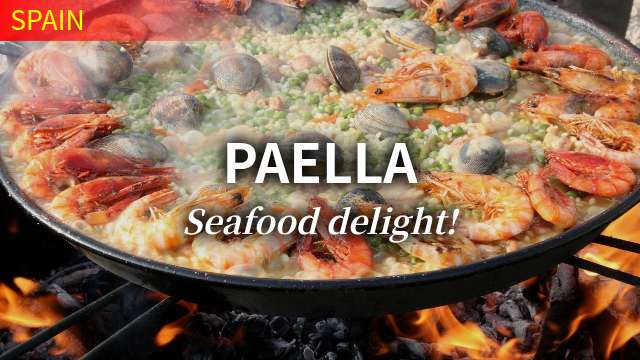
The "global-feasts-captions" sample workflow generates a captioned image like the one below.
Click to view gallery
This workflow adds a country name, dish name, and a message to a 16:9 aspect ratio photo. Let's create the SVG for this process using Inkscape.
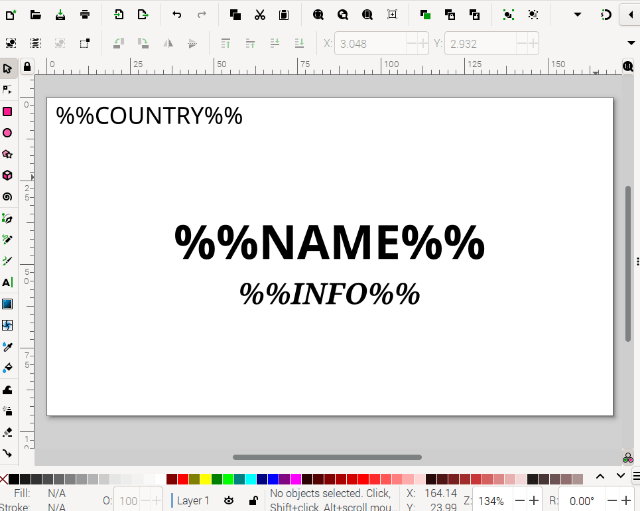
First, create an SVG with text placed as shown below.
- Launch
Inkscape. - Set the new document size to 640px width and 360px height in File > Document Properties.
- Select the "Text Tool (T)" from the left-hand toolbar to enter text.
- Click in the top-left area and type
%%COUNTRY%%. In the top toolbar, set a medium font size, "left-align" the text, and choose the "sans-serif" font. - Click near the center and type
%%NAME%%. In the toolbar, set a large font size, "center-align" the text, and choose the "sans-serif" font with a "Bold" style. - Click near the bottom of '%%NAME%%' and type '%%INFO%%'. In the toolbar, set a medium font size, "center-align" the text, and choose the "serif" font with a "Bold Italic" style.
- Click in the top-left area and type
- Select the "Selector Tool (arrow)" from the top of the toolbar to drag and adjust the text positions. You can use Object > Align and Distribute to precisely center the
%%NAME%%and%%INFO%%text relative to the page.
Notes on Replacement Text and Fonts
When entering placeholder text like %%NAME%% that will be replaced later, always start by clicking on the canvas with the text tool and write the text in a single line. Inkscape also allows you to create a text box and flow text into it, but text created this way often fails during the replacement process. Also, note that while you can specify fonts other than Serif or Sans-Serif, they will not display as intended if the browser running ad-pixflow does not support them.
Adding Decorations
While you can overlay text on an image with the basic template, plain black text might feel a bit dull.
Furthermore, black text on a dark image can be hard to read. You could either use different workflows for light and dark images (one with white text, one with black) or create a single, more versatile SVG that works well on any background.
Let's take the latter approach and add some effects to our SVG.
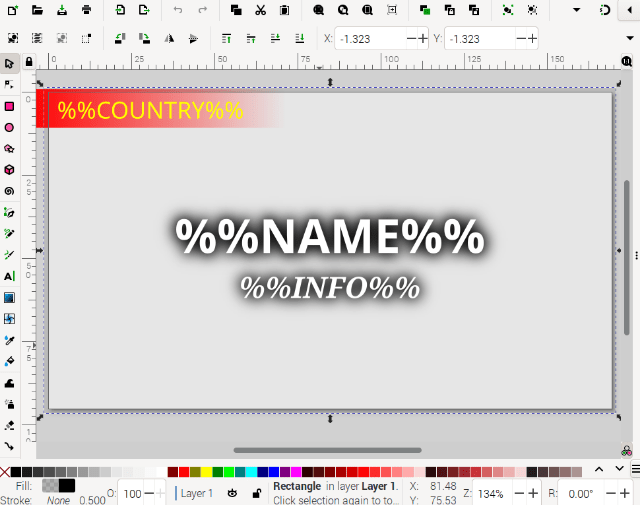
We've changed the %%NAME%% and %%INFO%% text to white and added a drop shadow to make it stand out. This makes the text legible on both light and dark backgrounds.
Additionally, we've overlaid the entire image with a semi-transparent black rectangle to slightly darken it. This ensures the white text remains visible even on very bright images.
Details: Editing in Inkscape
Decorating %%COUNTRY%%
- Use the rectangle tool to draw a rectangle over
%%COUNTRY%%. Send it to the back with Object > Lower to Bottom. - Use the color palette at the bottom to make the rectangle red.
- For more detailed color settings, open Object > Fill and Stroke. Select the rectangle with the selector tool and set the stroke color to "none" (the "x").
- Select the Fill tab of the dialog and apply a linear gradient to the rectangle. If you need to adjust the gradient's direction, click the gradient tool on the left.
- Select the
%%COUNTRY%%text and set its color to yellow using the bottom color palette.
Making %%NAME%% and %%INFO%% Pop
- With the
%%NAME%%text selected, go to Filters > Shadows and Glows > Drop Shadow. This adds a black shadow around the text. Setting the horizontal and vertical offsets to 0 creates a uniform glow. To remove the effect, use Filters > Remove Filters. To intensify it, apply the filter a second time. - With the
%%NAME%%text still selected, use the color palette at the bottom to change its color to white. - Apply the same settings to
%%INFO%%.
Adjusting Overall Image Brightness
- Create a rectangle that covers the entire canvas and set its color to black. In the "Fill and Stroke" dialog, set the Fill opacity to 10%.
- Send the rectangle to the back with Object > Lower to Bottom.
With the SVG complete, let's test it right away.
As you did previously with the "photo-frame," please copy the sample workflow "global-feasts-captions" and integrate your newly created SVG file.
While experimenting, you are free to add custom decorations to match your preferences, and you will find it easy to add new text areas. By observing the overall workflow structure, you will also notice that adapting it for different resolutions is quite simple.
Tip: Converting a Bitmap Logo to SVG
Many users want to add their original logos to images. While AI can generate logos, it often produces high-quality bitmap images but falls short when creating clean vector graphics like SVG.
You might also want to use an existing logo from print materials or even a hand-drawn design. You can scan these as bitmap images, but they will look pixelated (jagged) when scaled up.
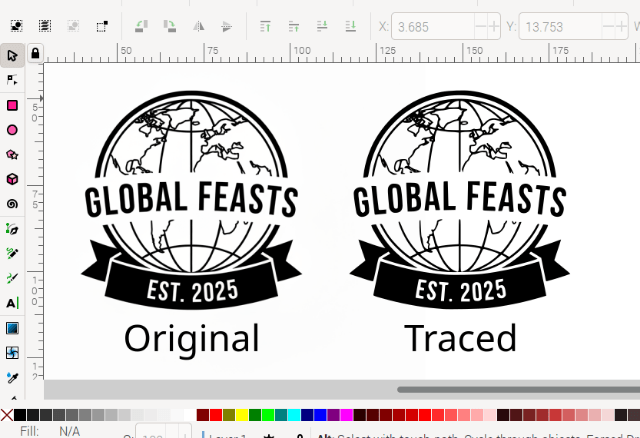
Inkscape's "Trace Bitmap" Feature
This is where Inkscape's "Trace Bitmap" feature comes in handy. It allows you to convert a bitmap image into a vector graphic. The image below shows an example where the bitmap logo on the left was traced to create the vector logo on the right.
Details: Editing in Inkscape
- Drag and drop the bitmap image onto the
Inkscapecanvas. - With the bitmap image selected, go to Path > Trace Bitmap to open the "Trace Bitmap" dialog on the right.
- Select the "Single scan" mode, adjust parameters like "Threshold," and click the "Apply" button.
- After tracing, the new vector image will be placed directly on top of the original bitmap. Drag one of them aside to see the newly created vector graphic.
- If you want to save only the traced SVG logo, delete the original bitmap image, then go to File > Document Properties and click "Resize to content" to fit the document size to your logo.
For black and white logos, this method can produce very clean SVG results. You can also convert color images using the "Multicolor" mode, but adjusting the parameters can be more complex.
Once converted to SVG, you can scale the logo to any size without loss of quality. You can also easily apply effects like drop shadows within Inkscape. The "global-feasts-logo" sample workflow uses an SVG created this way.
![]()
Click to view gallery
In this sample workflow, the traced logo is displayed in the bottom-right corner using the SVG Overlay filter.